

Having a File/Media server can be very useful in your home network. It can be used to store Photos, Videos and Music. You could also use them as a backup for your PC or Mac. I love Synology NAS Servers but they are quite expensive. If you are looking for a quick and cheap alternative, then you have come to the right place.
- Installing Raspbian
- Installing Open Media Vault
- Setting up a file share
- Accessing from windows
Installing Raspbian
- The things your are going to need are, a Raspberry Pi, SD Card and a USB HDD.
- Head to the Raspbian Download page and download the Lite version. This version does not have a Desktop, only a command line to interface with.

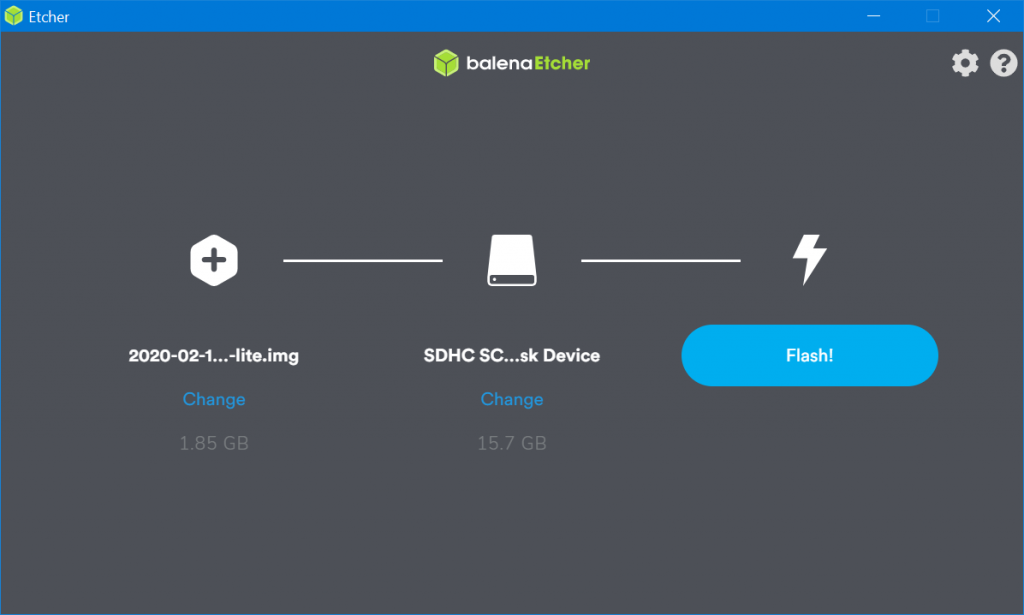
- Now use an image writer to burn the image to an SD Card. I prefer to use balenaEtcher.
- Open the program and select your Raspbian Lite image. Next select the target (Your SD Card) and then press Flash! This will go through the process of burning the image and tell you when completed.
- Now before you remove the SD Card we will enable SSH (Remote Access) so we don’t have to physically touch the device, find a screen etc.
- Go to files and find the drive labelled Boot.

- Right click and select New -> Text file. Name the file ssh.txt
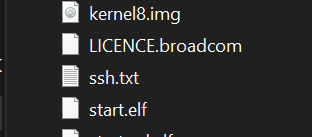
- Now rename the file and remove the .txt so the file is just ssh with no extension. Press yes to confirm.


- Now insert the Card into your Pi and boot it up, be sure to plug in an Ethernet cable.
- Now scan the network and find the IP address. I use advanced IP scanner. After installed you press scan and this will scan all devices on your network. There should be a device called RASPBERRYPI

- Now connect via SSH, if your using windows 10 you can use command prompt. Follow this guide to Enable SSH in CMD. You can also use putty.
- Open CMD and enter ssh pi@<your IP>

- Enter yes
- Enter the password “raspberry”
- Run the command sudo adduser pi ssh This adds you to the SSH group and allows you to use ssh more than once.
- Now Raspbian is installed.

Installing Open Media Vault
- Run the command sudo apt-get update
- Next reboot using the command sudo reboot this will close your session and you will need to reconnect with the method you used earlier.

- Once you are in again, run the command to install Open Media Vault, this can take a while. Mine took half an hour.
- wget -O – https://github.com/OpenMediaVault-Plugin-Developers/installScript/raw/master/install | sudo bash

- when it is complete type the IP address into your web browser, this will bring you to the login page.
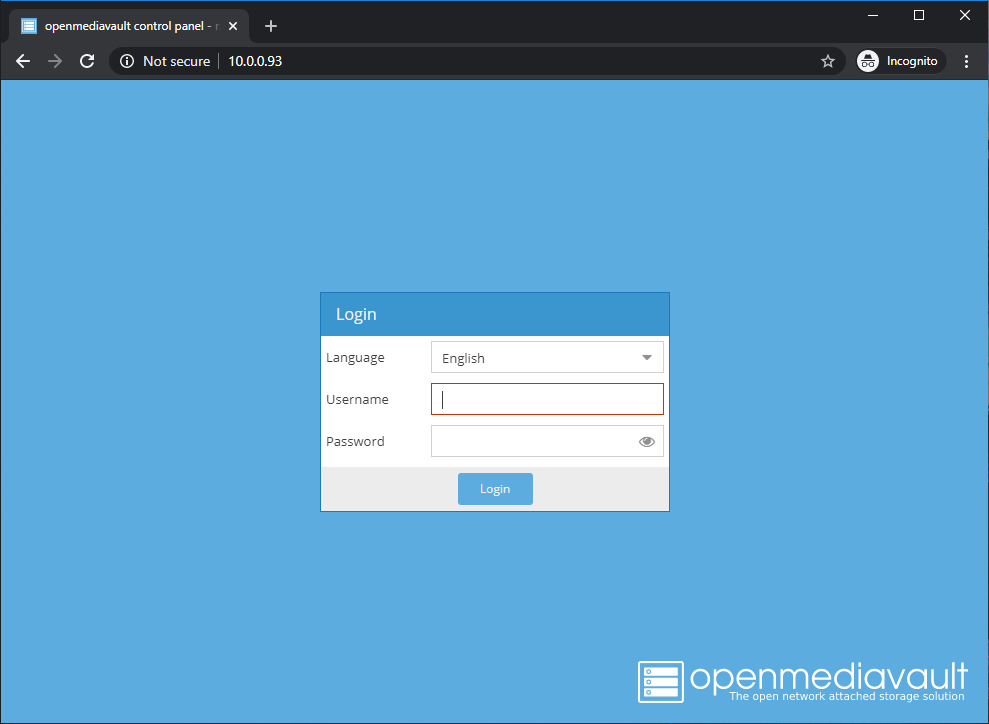
- Username: admin Password: openmediavault
- Now we will change the user account password, go to System -> General Settings. Then change the tab at the top to Web Administrator Password. Enter your new password and click save.

- Now we will setup the network connection. To do this go to System -> Network. Select the interface tab and press add, then Ethernet.

- Select the interface and DHCP for IPv4

- Now plug in your storage drive. This can be a USB HDD or a USB Stick. Ideally a large USB Hard Drive.

Setting up a file share
- Under Storage -> Disks, if you already have a partition on your drive you will have to delete it, using the Wipe Button.
- Select the quick option. Then press close.
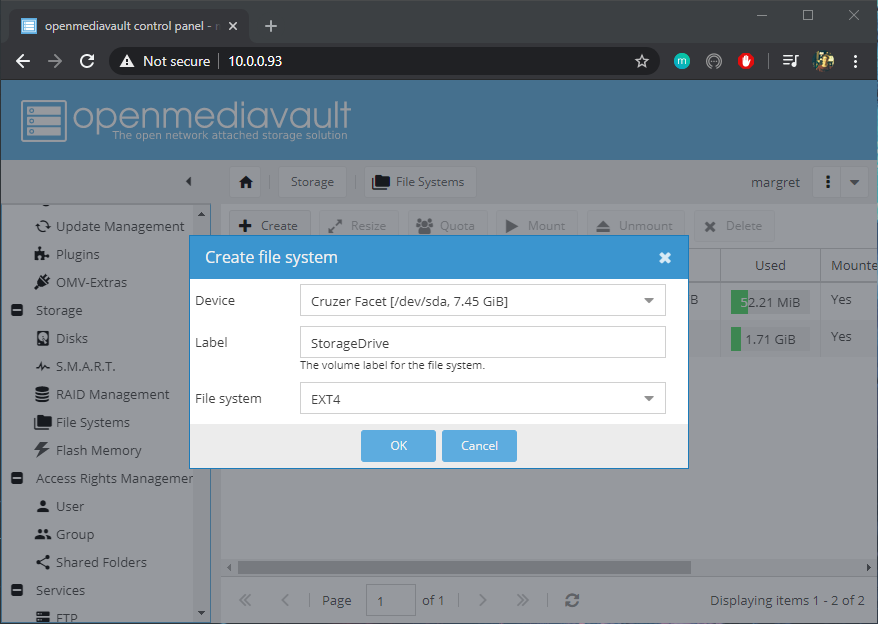
- Now under Storage -> File Systems, press the create button.

- Enter a Name, select your storage device and leave as Ex4. Press OK and then Close.
- Under Access Rights Management -> shared folders select add.

- Enter a Name, Select your storage device, Enter a folder path, and select permissions. I’m going to leave permissions as default. Click save.

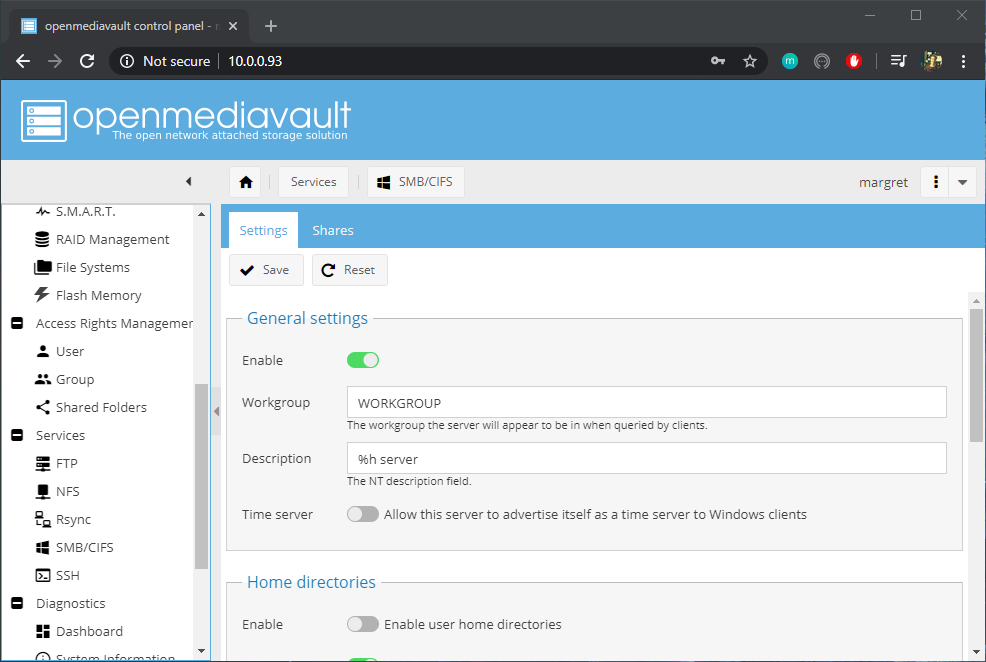
- Under services -> SMB/CIFS -> General Settings select enable and click save.
- Next click the tab at the top called Shares, then select add.
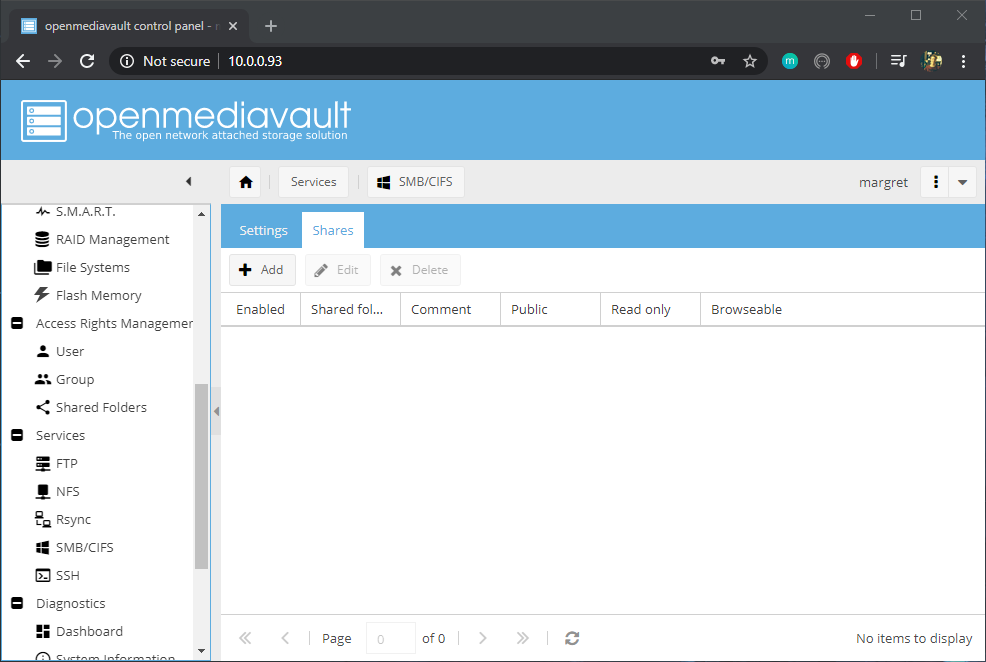
- This is finally going to create the share that windows will see. Select add.
- Select the shared folder you created earlier. I’m going to leave everything else default and press Save.

Accessing from windows
- Go to Access Rights Management -> User, select pi and edit. Enter a new password and confirm it. Select Save.

- Now on windows type in \\<your IP Address> and enter the user account pi and the password you created earlier.

- You should then be able to access your share on windows.
- From here you can add and store files on the Server.
- You can also right click on the share and select “map network drive..”

- Click finish. This maps it to your computer and will show up in “This PC”, this makes it easier to use and add files to.

Finishing Up
There are so many other things you can do with Open Media Vault. We have setup a basic file share, now you can go on and look at other features. Look out for future feature tutorials. If you have something you’d like me to cover, just leave a comment 🙂
This is a good start, if you do start to use this as a file server, seriously consider looking at a Synology NAS. They offer a fantastic interface and many more features.


Recent Comments