
Having a NAS is great, it allows you to do all number of things from backups and testing to remote access. While having a strong password is essential, it is also a good idea to secure your NAS with 2 factor authentication (2FA) if you are going to expose it to the internet. This is very simple on a Synology NAS, so follow along below to learn how to set this up.
Setting up Recovery Email
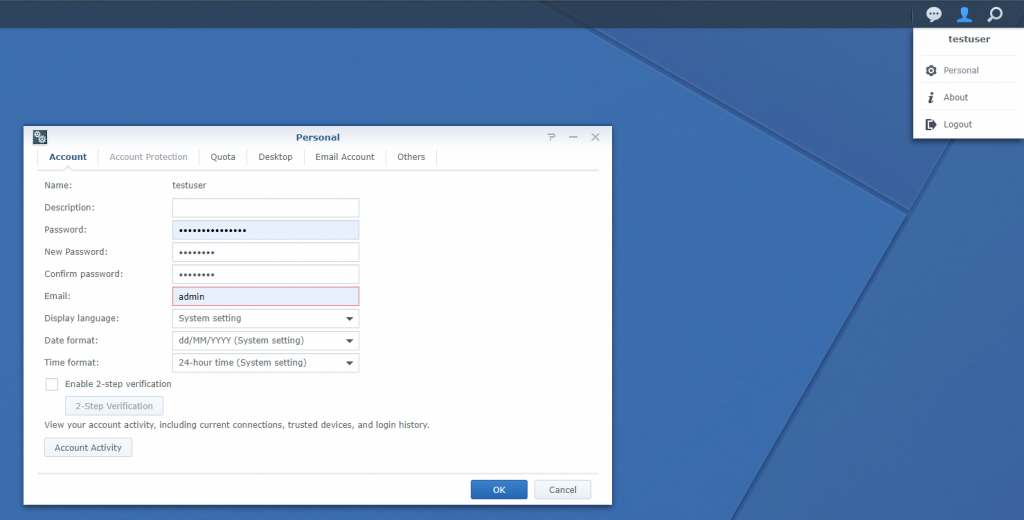
- Log into your Synology NAS, in the top right corner select the “Person” icon and select “Personal”
- Now before you setup 2FA you need to setup an email, in case you ever need to reset it. Select the “Email Account” tab, select add
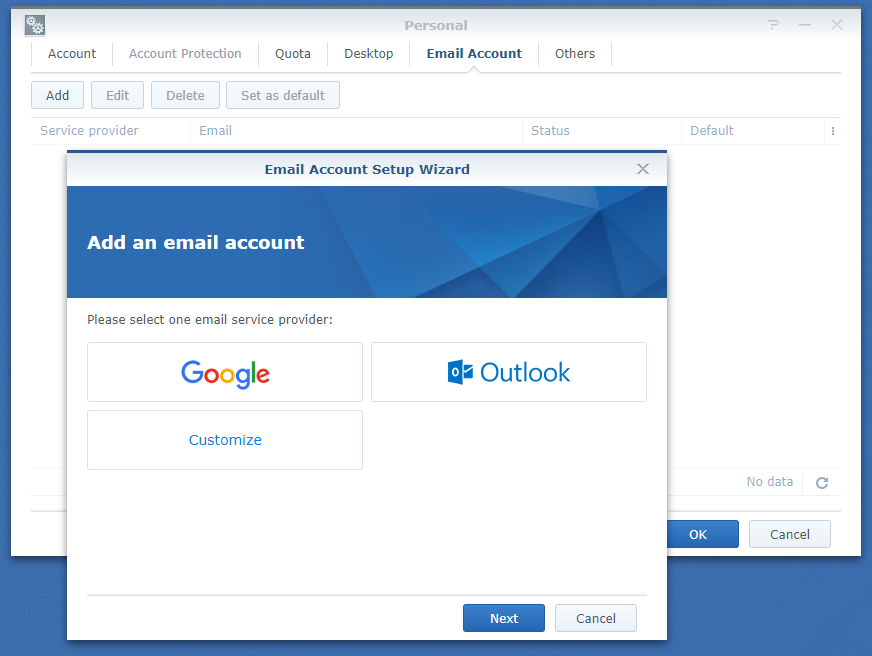
- Select your account type, I am going to select Gmail (You can use outlook or custom however custom will require you to know the IMAP details), Enter your email address

- Select the “Authenticate” button, the process will be a little different if you use outlook but should be similar

- Select “Allow” so Synology can access your Google account, then select “Agree”

- You should then see “Authentication Successful!”

Setting up 2FA
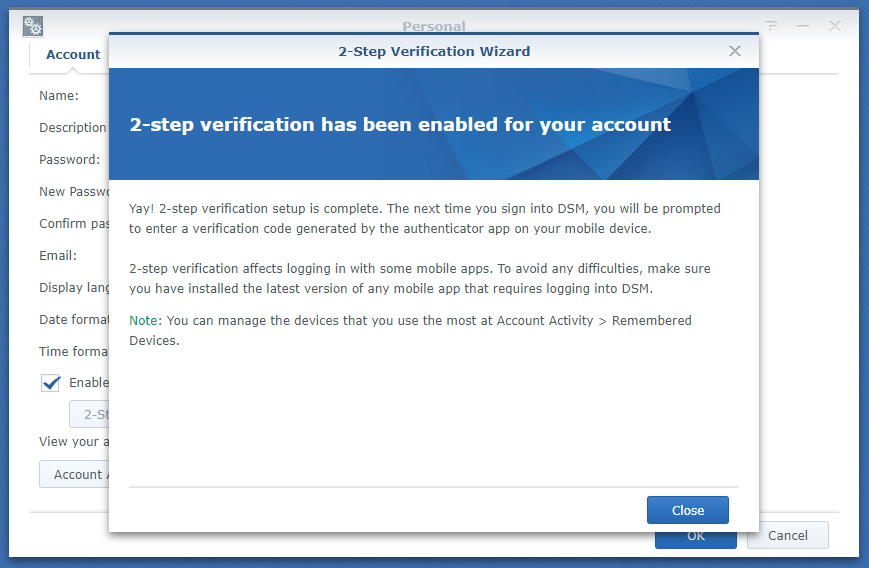
- Now go to the “Account” tab and tick “Enable 2 step verification”
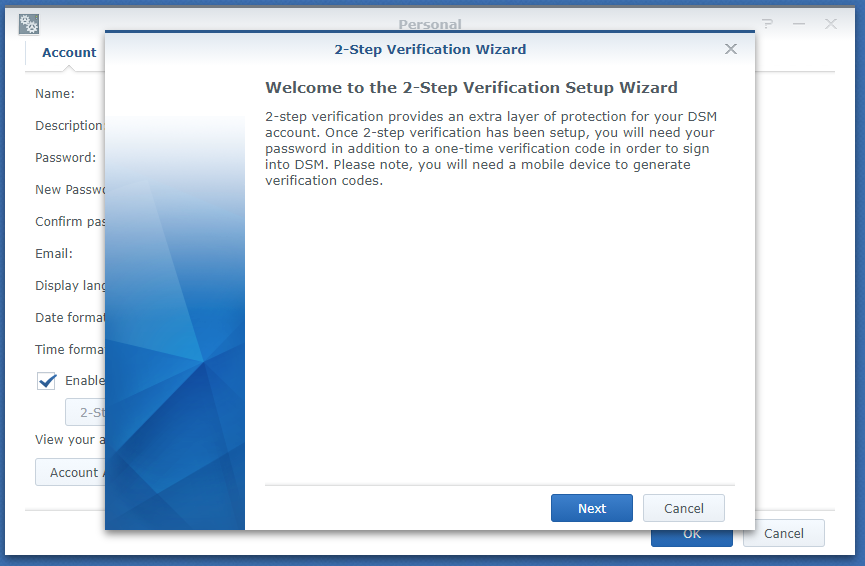
- Select “Next”
- Enter the email you would like to use if you need to reset your 2FA, select “Next”

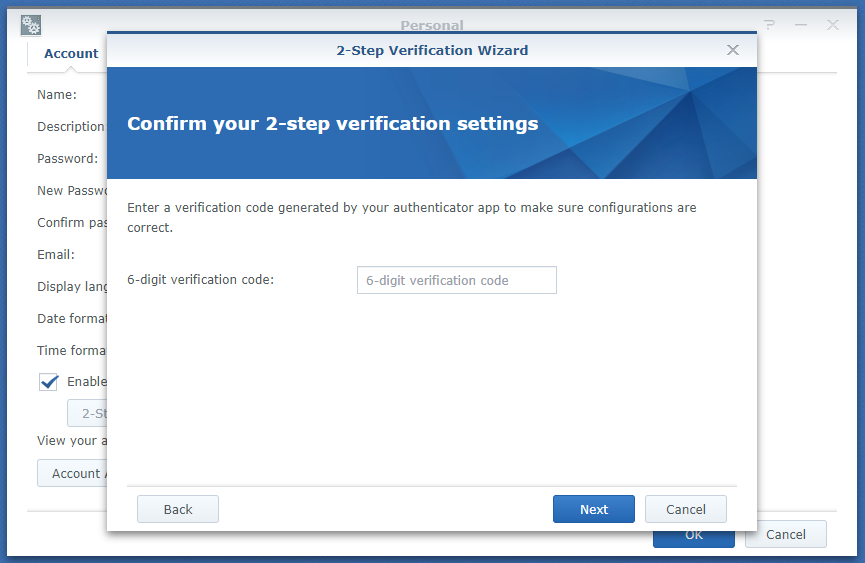
- Now you will see a qrcode. On your mobile open an authenticator app. I recommend authy as it can backup your 2FA codes to another device. For this tutorial I will use Google Authenticator.

- Select add in your Authenticator app and scan the qrcode on the screen.
- Once you have added the code to your Authenticator app, select “next” on the Synology and enter the code from your phone to verify it is correct
- You should see a success screen, the next time you log in you will be asked for this 6-digit code from your phone. Press “Close” and then “Okay” to save the settings.


Hi @Jarrod. You mention that you recommend authy but have done Google Authenticator for this tutorial. Have you managed to use authy for 2FA on Synology DSM as the documentation only refers to Google Authenticator?
Hey Martin!
Yes definitely, I Authy for all of my 2FA including Synology. In reality any 2FA app (Google, Microsoft, Authy) will work with any 2FA that uses a barcode to scan.
Have you ever found a circumstance where your NAS could not connect to the Internet and synchronization was lost between NAS and authy and the codes do not work?
Hey Patrick,
The NAS does not sync with Authy using the internet. Once the Authenticator app is setup using the QR code it will work offline, there is no connection used. Using Authy is no different to using Google authenticator or Microsoft authenticator.
does not work with authy. says – format not supported when you try to scan the QR code.
Hi Joe,
The Synology NAS will work with authy, I use it myself. Are you scanning the QR code that is intended for downloading the app? With DSM 7 there is a QR Code for IOS and Android to download the app on your phone, you would need to skip past these and scan the QR Code that has the box at the bottom to enter the one time code.