
Recently I’ve been setting up Home Assistant dashboard with TileBoard and wanted to control the Grid Connect fan switches through the interface. After a lot of looking and trial and error, I found a reliable way to get these switches working locally through Local Tuya. I am not going to go over how to install HA or Local Tuya there are already enough guides on that. I am just hoping this can save someone else hours of tinkering.
I’m assuming that…
- You already have Home Assistant setup and working.
- You have added the Fan controller to the Tuya App.
- You have HACS installed.
- You have signed up for a Free Tuya developer account and have got the “local” code.
- You have installed Local Tuya
Link and Guides

HOW TO – Setup Local Tuya in Home Assistant
In this video we will be running through the setup process for Local Tuya. We will also be having a look at some of the differences between using the Tuya C…
Tuya Smart Developer Center
Full range of smart device development tools, downloads and documentations.Connect your devices and products to the Internet of Things.
Code for the Fan Controller
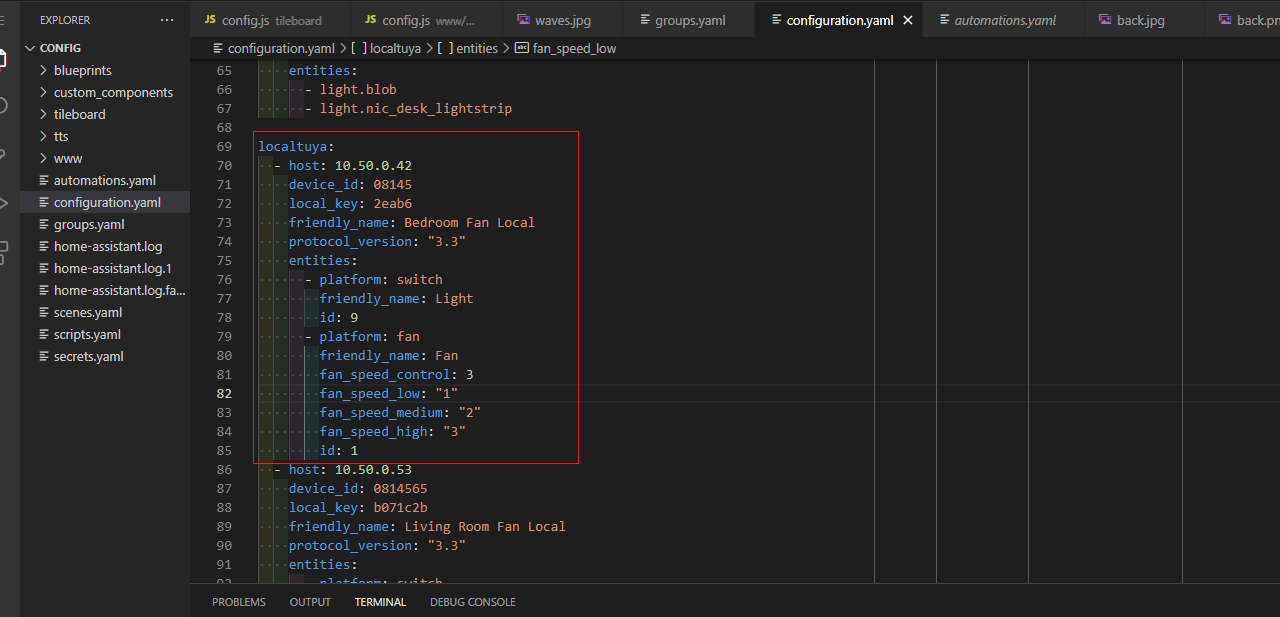
Now instead of adding the device through the home assistant GUI, we need to add the code for the fan controller to the configurations.yaml.
- Using file editor or VS Code open the configurations.yaml file

- add the following code to the bottom. Replace the <> fields with your settings.
localtuya:
  - host: <IP Address of Fan Controller>
    device_id: <Device ID>
    local_key: <Local Key>
    friendly_name: Fan Controller Local
    protocol_version: "3.3"
    entities:
      - platform: switch
        friendly_name: Light
        id: 9
      - platform: fan
        friendly_name: Fan
        fan_speed_control: 3
        fan_speed_low: "1"
        fan_speed_medium: "2"
        fan_speed_high: "3"
id: 1- Go to Configuration -> Server Controls. Select Check Configuration to ensure the code you added is correct.

- Restart the Server.
- Your Fan controller should then show up under devices. You will be able to control the light and fan speed.


Recent Comments