
Being in IT, I have a lot of test servers and applications running in my LAN Network. Most of these have self-signed SSL certificates; these produce an error every time I access them internally. What I am going to do in this tutorial is setup a certificate and have HA Proxy provide this cert, then proxy me to the correct server based on the URI entered. You can set this up externally or in the cloud, but for this demo I am going to do it for my LAN only. This is a long tutorial but once you have done it once, you will see how easy it really is.
*Please note this Guide shows you how to set this up on your LAN, it is not for External access. External access will require more steps and changes; See Bottom of page*
Things you will need:
- Public domain name
- Cloudflare account (Can easily be setup for free with no credit card)
- Pfsense Router
- * Make sure https redirection is disabled on your target server. This can cause redirect errors.
Install acme and HAProxy
- Log into pfsense and select System -> Package Manager.
- Select the “Available Packages” tab.
- Find “acme” and “haproxy” and install both.
- Once installed they will appear on the Installed Packages tab.

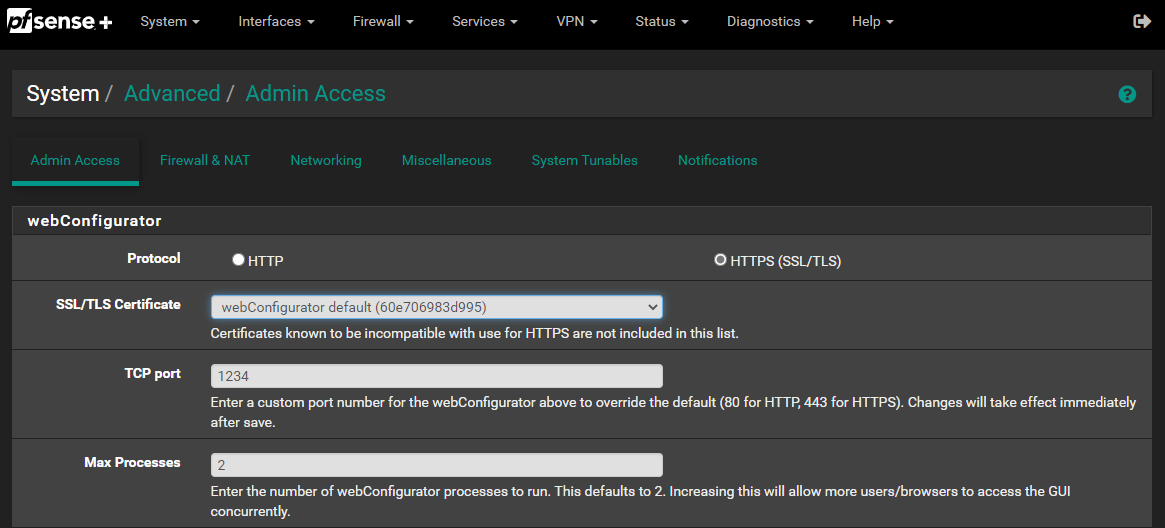
Change PFSense web port
- Since we are going to use port 443 for our proxy, we need to change the default PFSense web port.
- Go to System -> Advanced

- Under “TCP Port” change this to another port, I use 1234. Remember once changed you need to use this port to login. So I will use https://10.0.0.1:1234
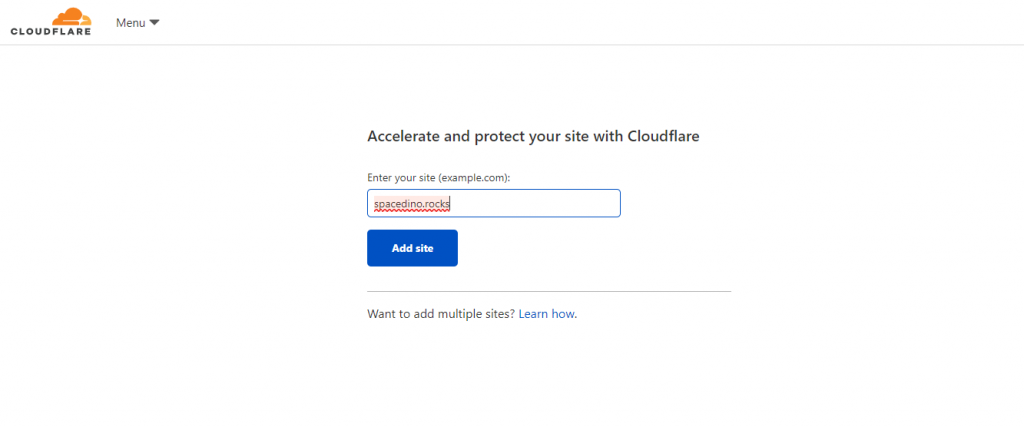
Setup your domain on Cloudflare
- Log into your Cloudflare account, if you don’t already have one you can make an account for free Cloudflare account
- You will get to the step of adding your domain, if you already have an account select “Add Site” from the dashboard.
- Enter your public domain name.
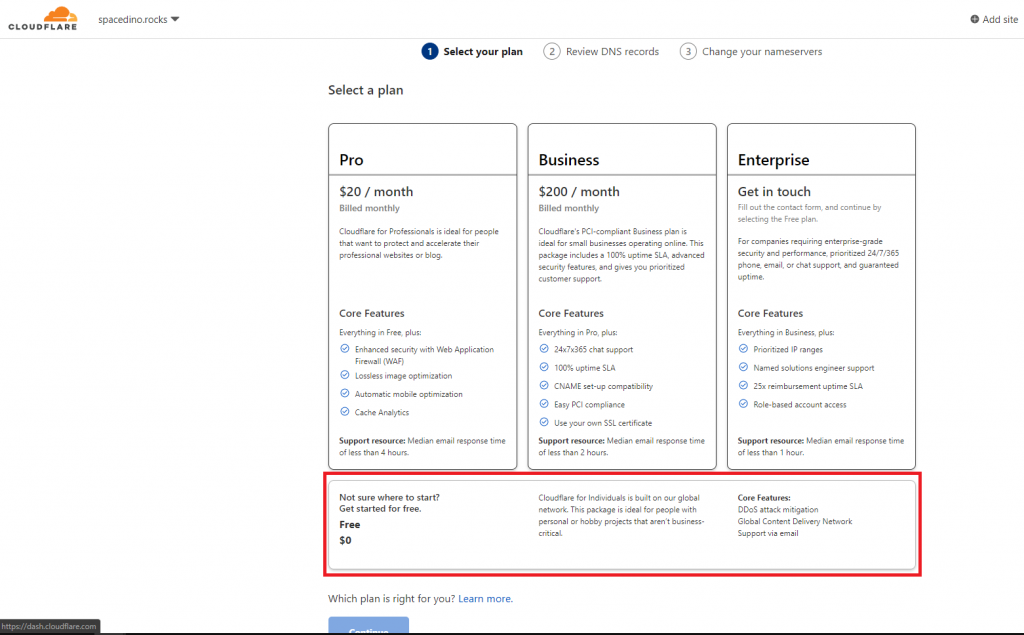
- Select the free plan, it will work perfectly for this.
- Cloudflare will try to scan your current DNS records, if you already have other records add them here.

- Now you will need to change your Domain Name’s name servers. This will be different for everyone; I will show mine using hover.

- Select “Check Nameservers” in Cloudflare. It may take a few hours for your nameservers to change and Cloudflare to update.
Setup Acme Certificate and Cloudflare API
- Still in Cloudflare select your domain and press “Overview”

- Scroll down and copy your Zone ID and Account ID, just into a notepad for now.
- Next select the user icon in the top right and go to “My Profile”
- Select “API Tokens” and press View on your Global API Key, copy this into notepad too.

- Lastly, under API Tokens press “Create Token”

- Next to “Edit zone DNS” select “Use this Template”
- Under Zone Resources, select your domain

- Select Continue and Create Token. Copy this to notepad also.
- Now login to Pfsense and go to Services -> Acme Certificates
- Then select Account Key.

- Now we are going to register an account with Let’s Encrypt. This is really easy, select add. Enter a name, select ACME v2 Production and an email address.

- Press “Create new account key” (You may have to wait for a minute), then “Register ACME account key”. Once done, select Save.
- Now go to the Certificates page and press “Add”
- Enter a name and description if you like.

- Now under “Domain SAN list” select DNS-Cloudflare

- Enter your Domain Name in the box Eg. spacedino.rocks. You can also use a subdomain Eg. I could use local.spacedino.rocks
- Enter your Cloudflare Account email and then the Zone ID, Account ID, API Key (Global Key) and the API token we created earlier.
- We also need to restart the Proxy when the Cert is updated, under Actions List select “Add” and enter /usr/local/etc/rc.d/haproxy.sh restart
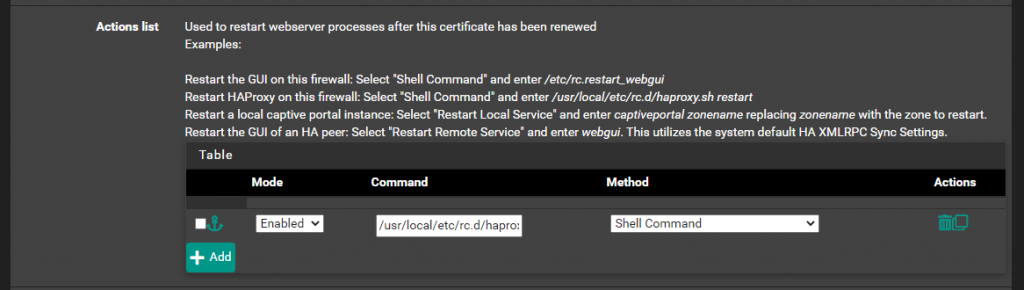
- Now Select “Save”
- On the certificate page, select Issue/Renew to get a cert. You should see a success text block come up after a few seconds and the date will update.

- Thats it for the Cert! You now have a certificate for your domain that will auto renew.
Setup HA Proxy
- Go to Services -> HAProxy. Select the “Backend” tab and press “Add”
- This is where we setup our internal web sever that we want to proxy to. My server is a web server on 10.0.0.7 port 80. Enter a name for the server, then press the down arrow under “server list”. Now enter your internal server IP and port. If it is secure enter 443 and tick “Encrypt(SSL)”, do not tick “SSL Check” as it would be a self-signed certificate on your server and cause an error.
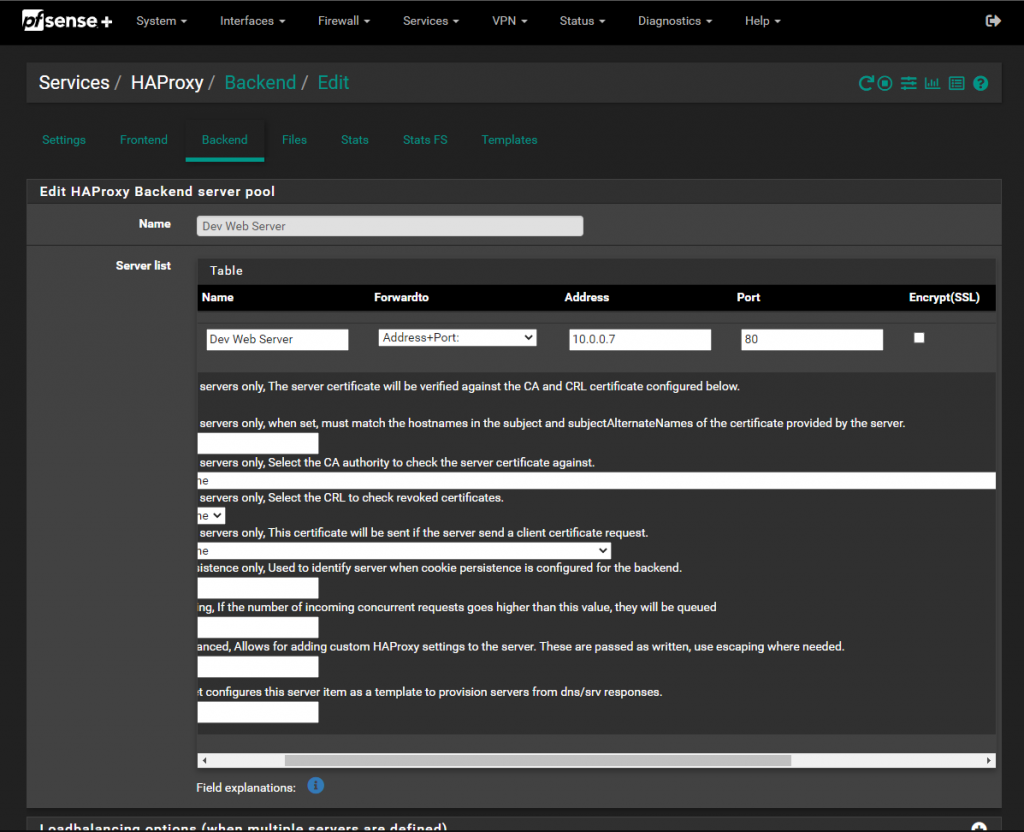
- Scroll down to Health Checking and select “None”

- Scroll to the bottom and press save.
- Now select “Front End” from the top tabs. This is where we setup the front-end proxy and have it redirect with our certificate to the back-end server.
- Select “Add” and enter a name. Now under listen address you can select where request will come from. I am only going to accept requests from my LAN so I will select LAN Address(IPv4) and enter port 443. Don’t forget to tick “SSL Offloading”. If you want this to be accessible from the internet you can also add WAN Address(IPv4). You will also need to open port 443 for external access.

- Now scroll down to “Access Control list”. Press the little down arrow and enter a name, change expression to “Host Matches” and enter the domain name you want in the “Value field”. I will enter spacedino.rocks

- Now under “Actions” press the little down arrow and select “Use backend”. Now enter the name of the rule you made in the previous step, make sure it is exactly the same. Select the Backend from the dropdown, you will likely only have one option from earlier.
- Lastly Scroll to “SSL Offloading”. Here, change the certificate to the one we created earlier.

- Now press save.
Setup Local DNS
- For this to work, we need our domain spacedino.rocks to point to the IP of the Pfsense router 10.0.0.1 (The IP and domain will differ for you)
- Go to Services -> DNS Resolver. At the bottom we need to add a mapping under Domain Overrides. If you are not using Pfsense for your DNS you will need to add this override to that DNS Server (Eg windows server or PI-Hole)

- Enter your domain and your Pfsense Router IP. Press Save.
Finished!
- Thats it, all done! Now to test. If all is setup correctly you should be able to enter your domain and it should connect to your server with an SSL connection, using a valid certificate.
- I will enter https://spacedino.rocks to test. As you can see if I enter the domain, I get a secure connection with a valid certificate.

- If, however I enter the local IP of the server it is not secure. HAProxy is providing and keeping the cert updated for us.

External Access
For external access you will need to do things like:
- Setup firewall rules to allow port 80 and 443 to pfsense from the wan.
- Setup a separate front end for external access. On this front end you would select “WAN Address (IPv4)” as the listen address.
- You will also need a static WAN IP address. You will need to set your public DNS record to point to that address.


Found this post in a general web search. I am using Acme and Let’s Encrypt on PFsense with HAproxy. I only get self-signed cert option when I “hit” my site – not a trusted CA authority lock. Any suggestions?
Hi Dan,
Did you follow my Guide and look to ensure the steps line up with what you have done? If not I would highly recommend you do
Without knowing what you have done I could suggest 2 things.
1. You may not have selected the correct certificate. (See Section – SETUP HA PROXY – step 9)
2. Your certificate may not have been generated properly. (See Section – SETUP ACME CERTIFICATE AND CLOUDFLARE API – step 10 onwards )
Can it be setup with out public domain name? Thank you
Hey AK,
Unfortunately, you need a real domain with public DNS to get a public SSL Certificate. You can buy domain names from places like Hover for $20 or less per year. I personally like .cloud
Anytime I browse to my site I get Too Many Redirects error page. Any idea why this is happening?
Hi Brian,
If you have Proxy turned on in cloudflare and automatic redirects this can happen. On the server that you are sending the requests to I would say you need to turn off automatic https redirection.
It’s weird. When I add the cert to the Frontend through SSL Offloading I get an Error 520 on the browser when accessing externally.
“There is an unknown connection issue between Cloudflare and the origin web server. As a result, the web page can not be displayed.
Do I need to do something on Cloudflare to get them to recognize the certificate?
Hi Brian,
This guide was written for internal access only. For external access you will need to do a lot more work, such as: You will need to setup firewall rules to allow port 80 and 443 to pfsense from the wan. You will also need to setup a separate front end for external access. On this front end you would select “WAN Address (IPv4)” as the listen address. You will also need a static WAN IP address. You will need to set your public DNS record to point to that address.
Thank you for responding so quickly. I made the mistake of not putting the wildcard A record in Cloudflare, instead, I had my specified subdomain which made the certificate check fail.
If I may ask, Cloudflare is giving me warning signs, as it looks like it is for you too, that that wildcard record is exposing my public IP. Is there a solution to this?
Hey Brian,
That was only when I made the account. I deleted the wildcard record after the domain was setup.
It’s weird that you got an error. I’ve only got my records put in manually, no wildcards. You’ve also go to be careful with acme and the certificates. If you get a cert such as *.example.com you can only use subdomains. The cert will not cover the example.com domain itself.
If I delete the wildcard record from Cloudflare, all goes offline. And that makes sense because all external users who use subdomains are going to use that record to point to my public IP. It needs to be there albeit it is not being allowed to be proxied by Cloudflare.
For each domain, you have that you want a certificate for you got to do steps 15-17 for example.com, and once for *.example.com. That will ensure that the cert will work for both of the Cloudflare records.
Then in HAProxy, you can redirect example.com to point to whatever host or backend you want as a default.
Hey Brian,
The wildcard record is not needed if you specify each subdomain as a separate A record in cloudflare. EG.
sub1.example.com -> Public IP
sub2.example.com -> Public IP
Yes correct, that will allow you to use subdomains and the base domain.
Hi Jarrod,
I am using latest version of pfSense with Cloudflare and latest version of ACME.
The certificate has been working fine until recently when it expired, I looked at the output in the pfSense GUI:
[Wed Jan 4 02:36:57 PST 2023] Adding txt value: eLqWSKA4rlSu8gZ6YxRY566DxMyaIAnMhVKKm1sIh4Y for domain: _acme-challenge.xxxxxx.xxxx
[Wed Jan 4 02:36:57 PST 2023] Adding record
[Wed Jan 4 02:36:58 PST 2023] Add txt record error.
[Wed Jan 4 02:36:58 PST 2023] Error add txt for domain:_acme-challenge.xxxxxx.xxxx
Do you have any idea where the issue is?
Here is details from the log:
[Wed Jan 4 02:30:26 PST 2023] Detect dns server first.
[Wed Jan 4 02:30:26 PST 2023] GET
[Wed Jan 4 02:30:26 PST 2023] url=’https://cloudflare-dns.com’
[Wed Jan 4 02:30:26 PST 2023] timeout=1
[Wed Jan 4 02:30:26 PST 2023] Http already initialized.
[Wed Jan 4 02:30:26 PST 2023] _CURL=’curl –silent –dump-header /tmp/acme/acme-letsencrypt-certificate//http.header -L –connect-timeout 1′
[Wed Jan 4 02:30:26 PST 2023] ret=’0′
[Wed Jan 4 02:30:26 PST 2023] Use cloudflare doh server
[Wed Jan 4 02:30:26 PST 2023] _ns_ep=’https://cloudflare-dns.com/dns-query’
[Wed Jan 4 02:30:26 PST 2023] _ns_domain=’_acme-challenge.xxxxxx.xxxx’
[Wed Jan 4 02:30:26 PST 2023] _ns_type=’TXT’
[Wed Jan 4 02:30:26 PST 2023] GET
[Wed Jan 4 02:30:26 PST 2023] url=’https://cloudflare-dns.com/dns-query?name=_acme-challenge.xxxxxx.xxxx&type=TXT’
[Wed Jan 4 02:30:26 PST 2023] timeout=
[Wed Jan 4 02:30:26 PST 2023] Http already initialized.
Hi Darryl,
I can’t say I’ve seen this issue before. I would first double check that the domain is still properly configured in cloudflare and your DNS for the domain is still pointing to cloudflare. I would also check that all the API keys used are up to date and the ACME cert is set to production. I assume you have already tried completely deleting the cert in ACME and re-creating it.
I would also try another domain if you have one.
I was having the same issue. I found this reddit thread that helped me: https://www.reddit.com/r/PFSENSE/comments/p1qqk0/cannot_get_acme_certs_working_with_cloudflare_dns/
I cleared all the fields in the “Domain SAN list” entry for Cloudflare and just filled in my email address and cloudflare API key and now it works!
Nicely written up. Couple of notes:
1. The ‘SSL Offloading’ portion of the configuration does not exist on my pfsense/HA Proxy/Front End
2. After following this all the way to the end, I discovered your stated requirement of a fixed ip address. Wish I had known this in the beginning.
Thanks Jay,
Thats odd, something may have changed in a recent update. I do state at the beginning that I am doing the Demo for LAN use only.
If you have a dynamic IP address, you can use dynamic DNS built into pfsense. Under Services -> Dynamic DNS