

HOW-TO: FREE BACKUP FOR MICROSOFT 365 WITH SYNOLOGY ACTIVE BACKUP FOR MICROSOFT 365 | 2022 Update – Jarrod’s Tech
Microsoft 365 is great but backup can be expensive. After moving most of our clients from On-Prem Exchange to Microsoft 365, I began to think about backup. Most back up services cost a dollar or two a month, which can add up quickly if you have 100’s of accounts to backup. If you’ve been on […]
Microsoft 365 is great but backup can be expensive. After moving most of our clients from On-Prem Exchange to Microsoft 365, I began to think about backup. Most back up services cost a dollar or two a month, which can add up quickly if you have 100’s of accounts to backup.
If you’ve been on my site before, you’ll know I love Synology NAS’s. Once I found out that they offer a License Free backup solution, I was sold. After some testing, I found it to work very well. The only thing you’ll need is a Synology NAS that has an Intel CPU.
- Log into your NAS and install “Active backup for Microsoft 365”. Open the package and select add
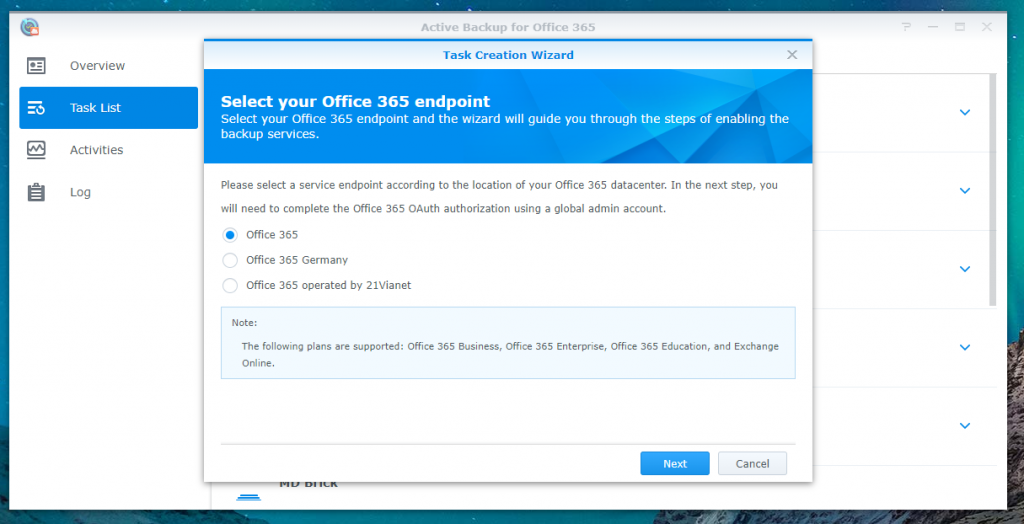
- Select your Microsoft 365 version (the top option for most people) and click next

- Now sign in with an account that has global admin privileges

- Select “Accept” this allows your NAS to back up the data from all accounts in the tenant
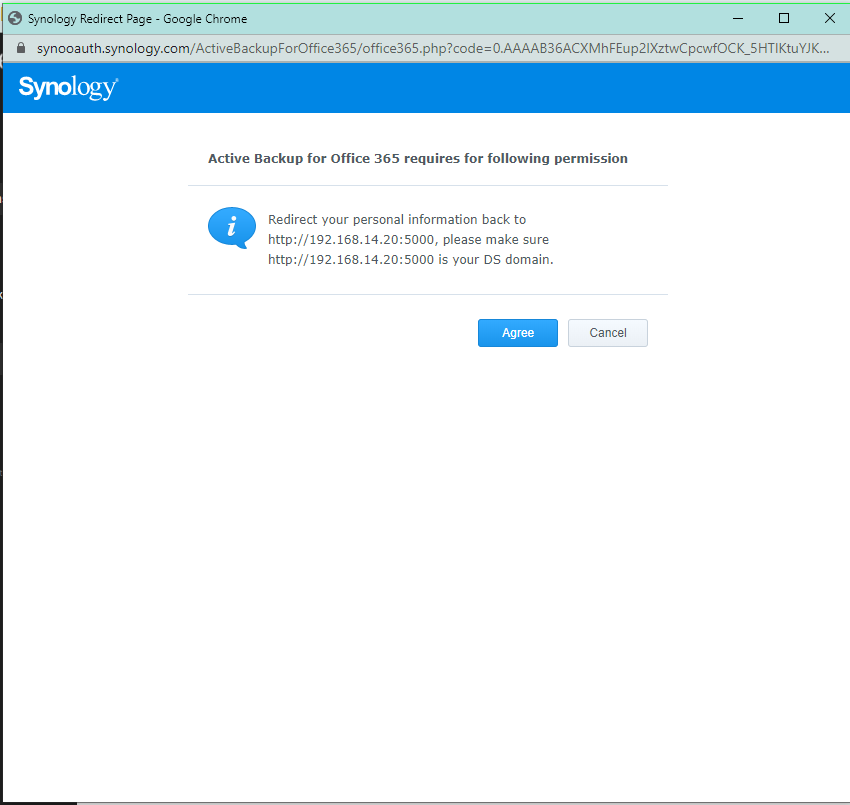
- Press “Agree” and make sure that is the IP/Domain of your Synology NAS

- Next enter a name for the task and select the backup destination (The share on the NAS to store the files). You can also click what types of items you would like to backup for each account. If you would like to change which sites and users are backed up, press the “Edit” button. This allows you to deselect individual users and types.

- Next select when you would like to run the backups. I run mine once a day at night, but that is up to you.
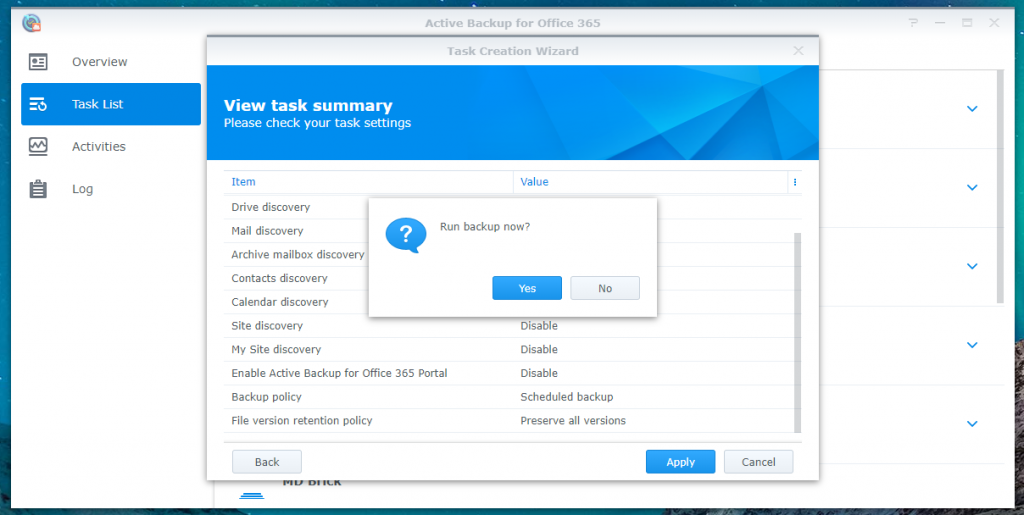
- If all looks good, hit “Apply” and then “Yes” to start the backup. The initial backup can take a while if you have some large inboxes. Some of mine had inboxes of 80+ Gigabytes and the Tenant took over a day to fully backup the first time.

- Head to the Dashboard and you will see an overview of all of the accounts that are backed up. As well as logs and storage statistics.


Recent Comments