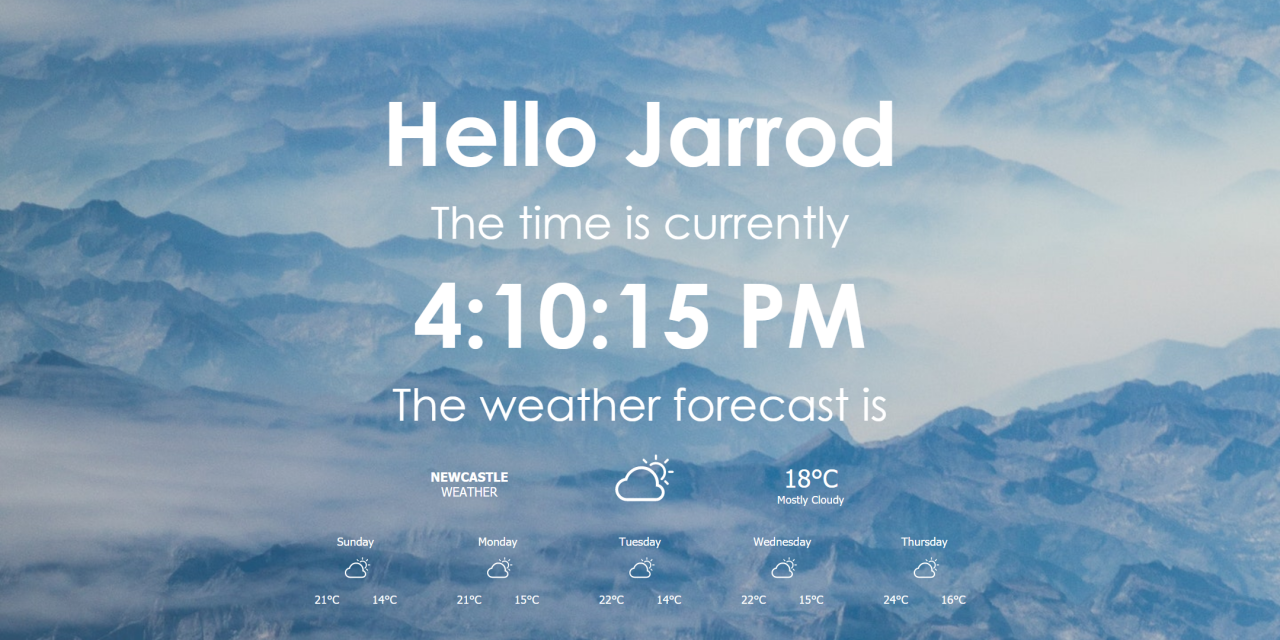
This is a project I have been working on for my house. It makes a nice Photo Display with weather and the time. It can be easily customized to suit your needs. Below I will detail the project and how to set it up on a Raspberry Pi.
- First you will need to install Raspbian, the fastest way is to download the image from the raspberry pi site. Download the “Raspberry Pi OS (32-bit) with desktop and recommended software”
- Once downloaded extract it with windows explorer and you will now have an .img file.
- Install Etcher. Open it and select your SD card and the .img from earlier.
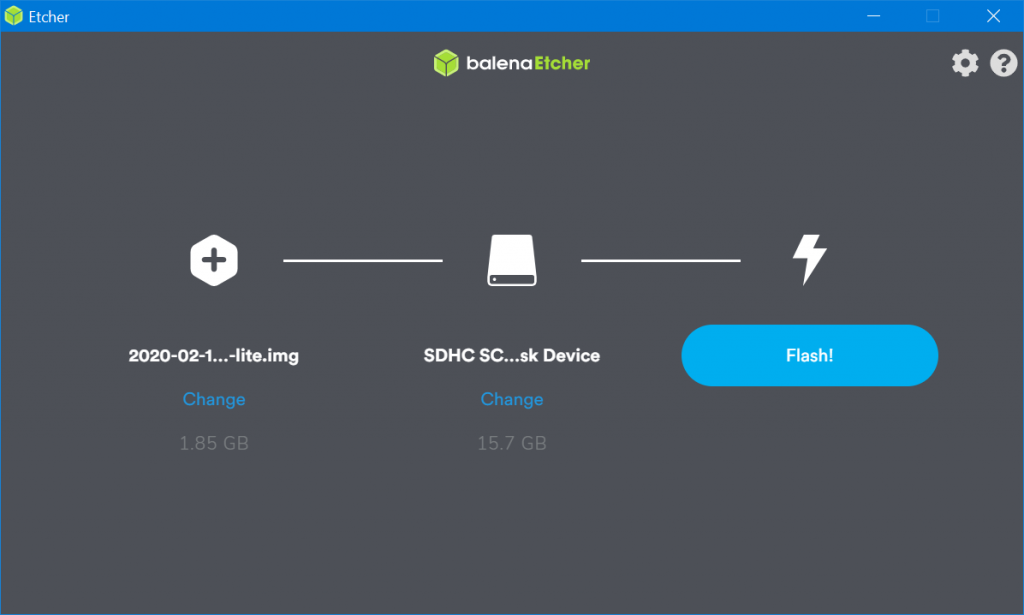
- Select Flash and it will write the OS to your SD card. When done insert into your PI.
- Once the SD card is inserted into your Raspberry Pi you can turn it in and it will boot into Raspbian.
- Next we will need to install Apache, Open the terminal and run the following steps….
- Install – sudo apt-get install apache2 -y

- Install PHP – sudo apt-get install php libapache2-mod-php -y

- Open the terminal (as you need elevated privileges to move files), and run the command – sudo pcmanfm

- Download my files (Link at bottom) and in the explorer windows from step 9 add to the /var/www/html folder.
- Add your own images to the folder and the PHP file will automatically find them.
- Run the code to disable the screen from going off and disable the mouse cursor.
- sudo apt-get install -y chromium-browser ttf-mscorefonts-installer unclutter x11-xserver-utils
- Now run this line to bring up the auto start file
- sudo nano /etc/xdg/lxsession/LXDE-pi/autostart
- In the text editor that pops up change the line @xscreensaver -no-splash to #@xscreensaver -no-splash
- Next add the following (Note: The dashes before each word are double dashes – -)
@chromium-browser –kiosk –start-maximized –incognito http://localhost
@unclutter
@xset s off
@xset s noblank
@xset -dpms
- Press CTRL + o then Enter to save the text editor. Press CTRL + X to exit the text editor.
- To change the name on the PHP page simply open it (index.php) with a text editor like atom, or simply double click on the file and it will open on the Pi. Change the name in the h1 tag and save it.
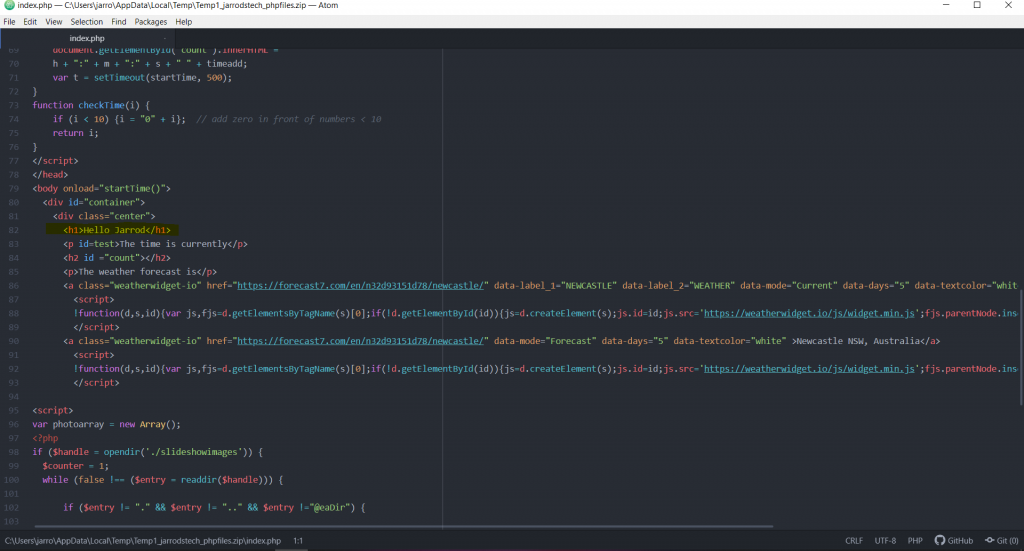
- To change the weather location, you can go to this site https://weatherwidget.io and put in your location. Press get code and copy the URL for the widget into the widget on the PHP page using a text editor.
- And that’s it you should now have a working information screen / sideshow. Feel free to edit the page however you like. Plug it into a nice monitor and enjoy. You could also share the web folder via samba and add photos via the network. How To: Raspberry Pi Shared Folder
- Also if you need to close the sideshow to work on the PI just press Ctrl + Shift + Q
- I have also made a second version of the webpage – you can check it out here Project: Raspberry Pi Information Screen Refined
File – PHP Webpage Files and Folder



Appreciation to my father who informed me concerning this blog,
this webpage is truly amazing.
I’m not that much of a internet reader to be honest but your sites really
nice, keep it up! I’ll go ahead and bookmark your site to come back later.
All the best
Have you ever considered about adding a little bit more than just your articles?
I mean, what you say is fundamental and all. However think about if you added some great pictures or videos to give
your posts more, “pop”! Your content is excellent but with images and video clips, this website
could certainly be one of the best in its field. Excellent blog!
Do you mind if I quote a couple of your articles as long as I
provide credit and sources back to your blog? My blog site is
in the very same area of interest as yours and my users would genuinely benefit from some of the information you provide here.
Please let me know if this ok with you. Appreciate it!
Yeah no problem
Hello! I’m at work browsing your blog from my new iphone!
Just wanted to say I love reading through your blog
and look forward to all your posts! Keep up the fantastic work!
Hey there! This is my first visit to your blog! We are a collection of volunteers and starting a new project in a community in the same niche. Your blog provided us useful information to work on. You have done a marvellous job!|
Hi Jarrod,
I am a new PI User looking to use this code for my PC Case.
I would use a 5″ screen at the bottom of my case.
I partly understand this, but I do not really understand the code and do not want to break my pi.
Could you create a tutorial video or timelapse of what you did so I can visually follow step by step?
Thanks (:
btw I love your blog!
Hi Harrison,
Thanks so much!
That sounds cool, I don’t do videos but I have just re-written my guide and added images for reference.
Theres no way you can break your PI with software so give it a go. Worst comes to worst you can just reformat the SD Card.
If you get stuck or have any questions, feel free to comment again.