
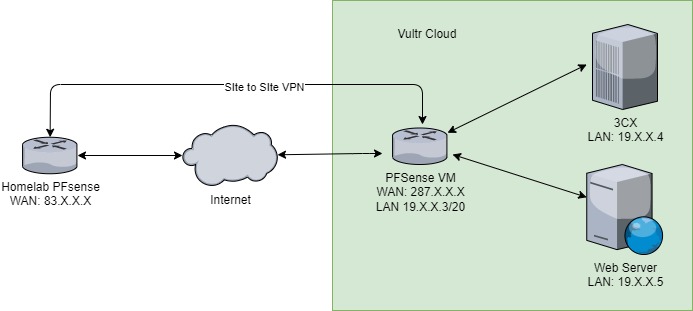
Recently I have set up some of my VM’s on Vultr. Now the Firewall from Vultr is fine, however I wanted something a little more advanced. I use PFSense normally and wanted to use this on Vultr too. I wanted to be able to have a site-to-site VPN from Vultr to my homelab setup. I also wanted to have some more advanced routing options.
Below I will show you how I have used PFSense to broker access to my other VM’s on Vultr. I have blocked all access to the VM’s using their assigned public IP and only allow access from behind PFSense using its assigned Public IP.
*I won’t be showing you how to setup a site-to-site VPN.
Create the Cloud Compute Instance
- Log into Vultr and select deploy a new Cloud Compute Instance.
- Select the location of your instance (Ideally the closest to you).

- Select FreeBSD 12.2 as the server OS and select the size of your instance. The $5 instance should do nicely for a HomeLab.

- Leave the other options default, enter a Server Label of “PFSense”. Click Deploy Now.

- Let your instance install, it will show Running when finished.

Install PFsense
We install FreeBSD to set up the drives initially. Now we can install PFSense.
*If you don’t install FreeBSD first, PFSense won’t be able to find a Drive.
- Click on your instance and go to Settings, click on Custom ISO.
- Change the ISO to PFsense and click “Attach ISO and Reboot“.

- You can then click on the “View Console” button in the top right.
- When ready you should see the PFSense setup screen in the console. Follow all the defaults.
- Select Accept, then Install, then Select, then OK, then Select, then OK.
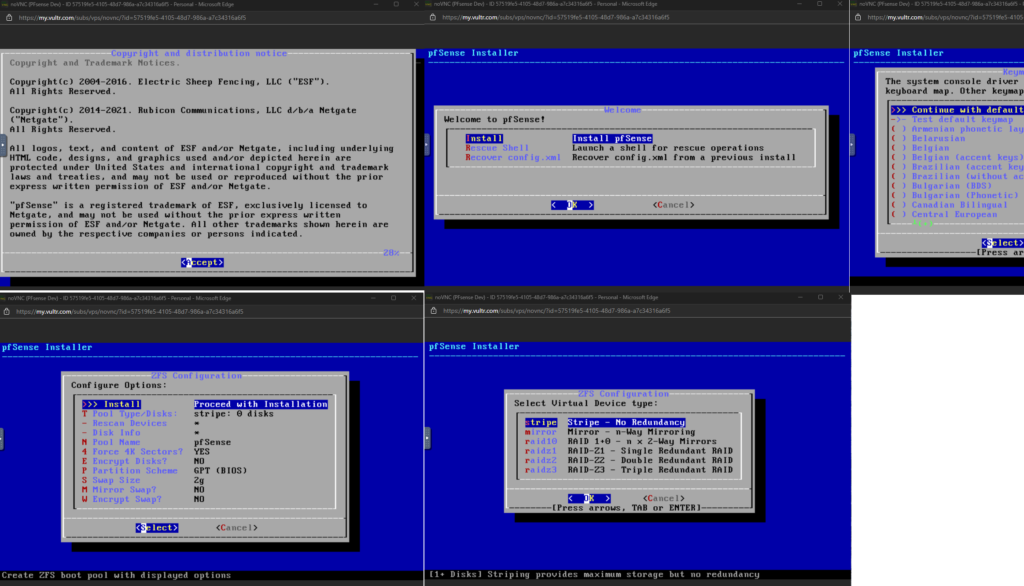
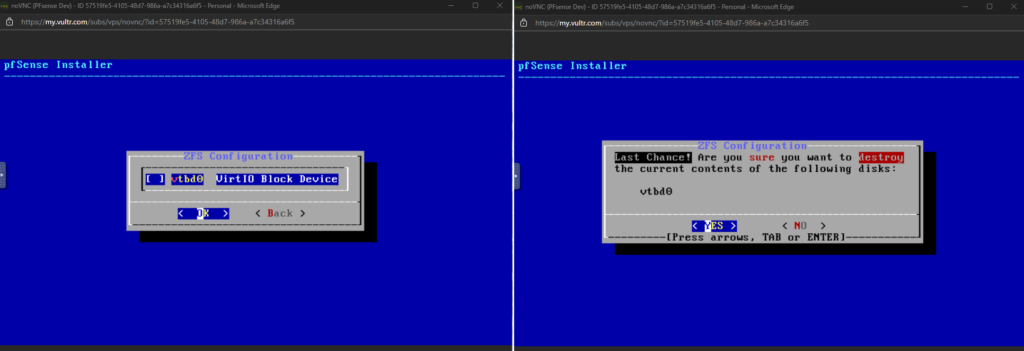
- At ZFS Configuration press space and then enter. Then select YES.
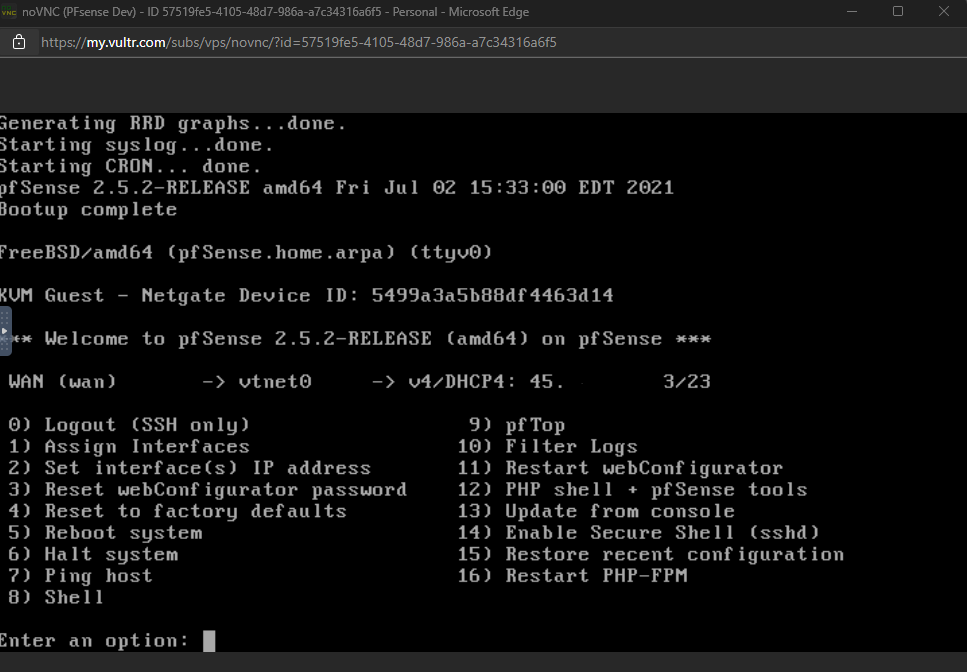
- When PFSense is done, you will see this screen.

- Now go back to your VM Instance and under Settings -> Custom ISO. Select Remove ISO.
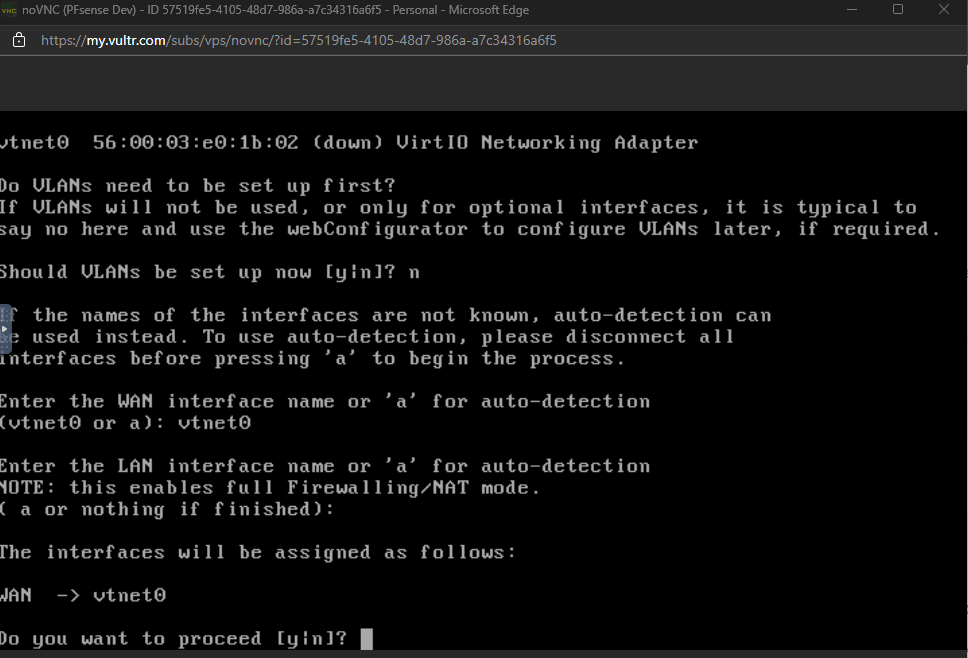
- Go back to the console and once your VM has rebooted, you should see the VLAN setup screen.

- Enter N and press enter.
- Enter vtnet0 and press enter.

- Press enter for the LAN as we don’t have one currently.
- Enter Y and press enter to proceed.
- This will finalize the installation.
Set Up PFSense
- Type in the IP assigned to your server.
- At the log in screen enter admin and pfsense as the password.

- Select next, then next again.

- Enter a hostname and DNS servers if you like. I’m using Google and Cloudflare DNS.

- Set the time zone.
- Leave the WAN as DHCP and press next.

- Enter a strong admin password.
- Press Reload.
- Press Finish.
Configure an Anti-Lockout Rule
If you don’t add this rule, when we add the LAN later, it will block us from accessing PFsense via the WAN IP.
- Go to Firewall -> Rules.
- Add a rule with the following options. Destination: WAN Address, Protocol: TCP, Source: singe host or alias / any (I would highly recommend putting in the IP address from which you are accessing PFSense, if it’s static. This stops anyone from being able to access the web console.)

Set up the Vultr internal LAN
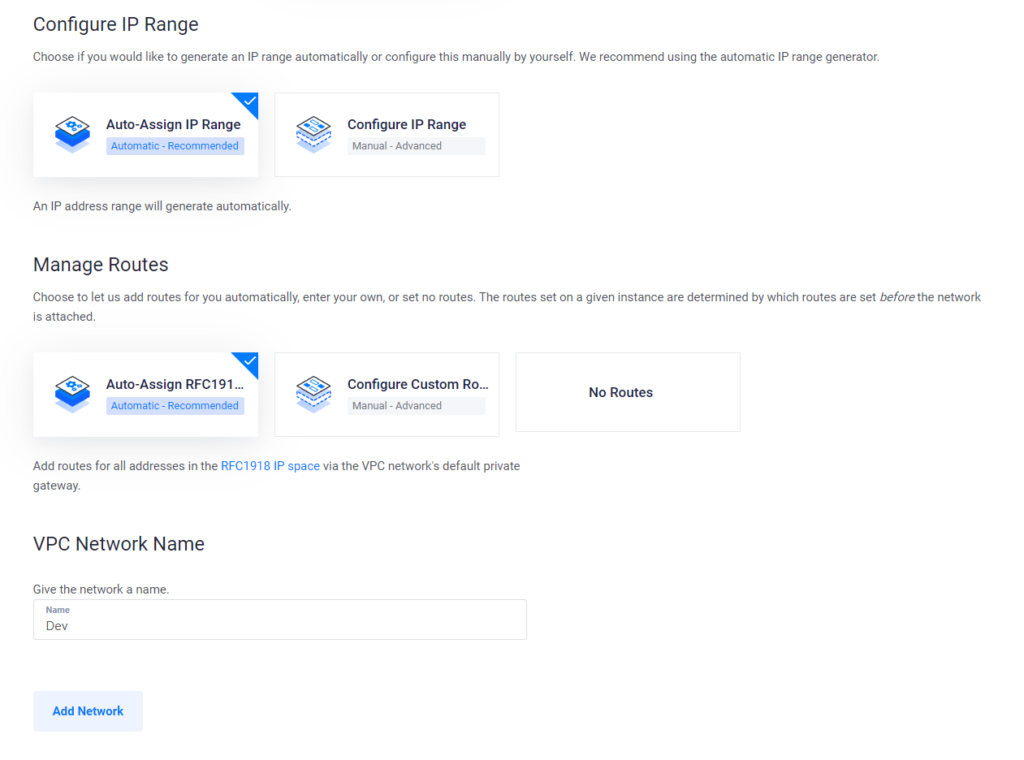
- In Vultr go to Network -> VPC Networks. Select Add.
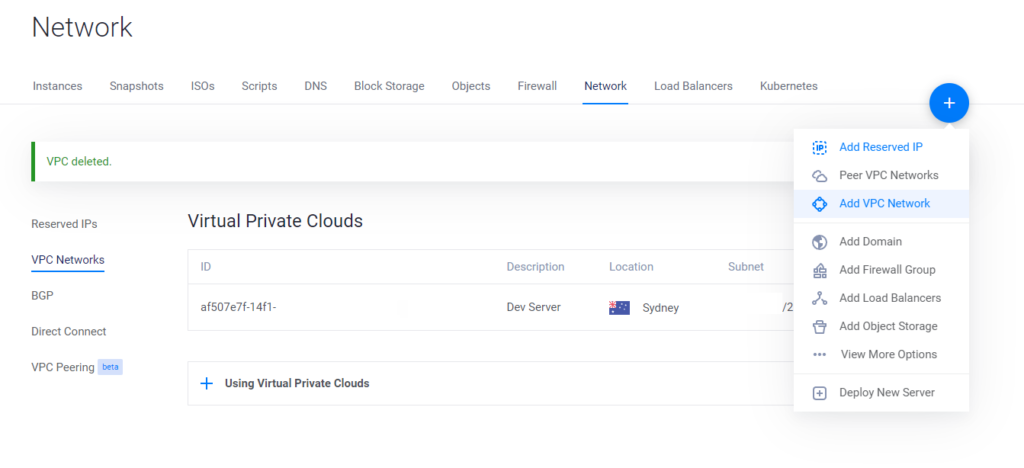
- Choose the location your server is in.
- Leave everything else default. Enter a name and press Add Network.
Assign LAN to PFsense
- Select your VM and go to Settings -> IPv4.
- Under VPC use the drop down to select the VPC you created earlier. Press Attach VPC, then Attach VPC again.

- Once added, make note of the IP address and subnet.

- PFSense will now reboot. It will then have a second interface.
- Back in PFSense, select Interfaces -> assignments.
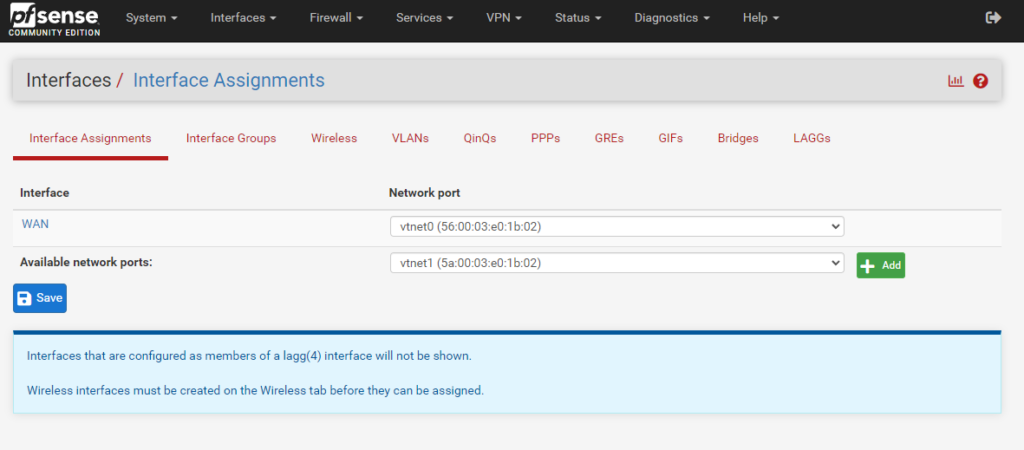
- Under Available network ports select the add button, then click save.
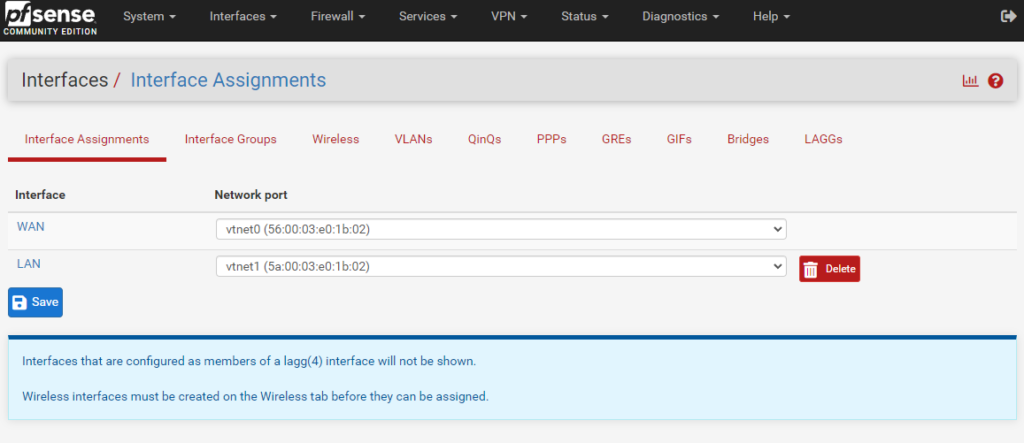
- Now press the LAN name.
- Tick Enable interface, change IPv4 to Static IPv4, enter the local IP from earlier and the subnet. Change the MTU to 1450.

- Press Save, then apply changes.
Final Notes
Thats it. Now you have PFSense setup to act as a router between the internet and your other VM’s.
On your other VM’s you just need to attach the same VPC Network to them. Then set the IP configuration of that interface on the VM to the IP given when you attach it to the VM. (Settings -> IPv4 -> VPC Network) Use your PFsense LAN IP as the default gateway.
On your other VM’s I would also recommend you set up a Firewall in Vultr that blocks all access and assign this to them. This blocks the traffic coming in on their assigned public IP, as we are now using PFSense instead.
I would also recommend setting up a VPN to access the pfsense interface and other VM’s. I currently use Wireguard and it is a great stable and fast VPN.


Hello Jarrod Really appreciate the effort you have put into your write-ups.
Looking to do something similar BUT backwards. Sent you and email with details to your hello address.
Hi,
Awesome tutorial, but unfortunately does not work for me. After 1 hour or so online working like a charm suddenly pfsense stops responding. I don’t know but its something related to the LAN network because the only way to make it work again is removing the LAN from the pfsense on vultr webportal. Once done pfsense works as expected. I’ve tried with different arch’s on vultr webportal but same results. Any advice ?
Thanks in advanced.
Thanks Durden!
I am not sure what the issue could be. I didn’t have any similar issues in my testing and I ran the system for months. Mabe try a different Vultr image with more resources, or maybe try creating a new Vultr LAN with a manual IP range.